A simple yet well designed and easy to operate furnace ensures efficient melting of metals in a hobby foundry. A good furnace will take you another step towards maintaining an important piece of equipment for your home foundry setup.

It is not difficult to design a furnace from scrap materials available around the workshop. This is not to say that it will appear cheap or poorly made, the point here is that you don't require to construct everything from new materials. The only material that you will need to purchase is the special high temperature resistant refractory to line the furnace walls with, along with some brass connectors from the local plumber for the gas feed line and some brass rod to custom design your own special gas jet for the burner. You can quite easily make the remaining things if you have the requisite metal working skills.
The simplest type of furnace is just a hole in the ground with a pipe passing through the ground and through the wall of the hole, equipped with a blower of some kind. A bellows will work, however an electric blower is much better. You may not like to have a hard-baked and trampled - around hole in your backyard, so building a furnace of a more portable type as described below may be a good choice. You can even construct a draft furnace with a 10-12 foot piece of steel irrigation pipe strung up from a tree as a smokestack. All that is required is intend to supply the fuel with a draft of air.
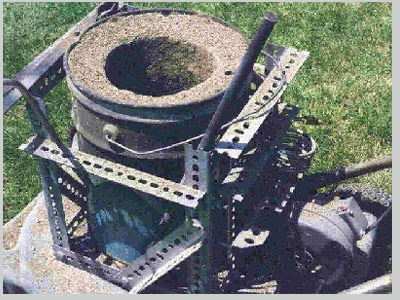
Given below is a simple diagram of the furnace that I am going to describe -I begin with an old 5 gallon steel oil bucket and make a hole in the side so as to permit the blower duct ingress to the combustion chamber. 2 firebricks were placed in the bottom of bucket to function as the floor of chamber. A sheet metal piece was rolled into a 7 inch diameter cylinder with a little taper that functions as a medium for molding the walls. This was put on the firebrick floor and centered on in the bucket. A piece of the 2 1/4 inch material utilized for the blower duct was put on through the bucket wall to work as a form for the blower duct hole. This made about a 2 inch thick wall, and left about 2 inches of free space around the melting pot (or crucible) to cater as combustion space and clearance for the lifting tongs.

The walls are constructed using the ganister that is a mixture of equal parts crushed firebrick and fire clay, mixed similar to that of cement with water. Bigger pieces of firebrick and pieces of coat hanger wire were mixed to the bucket when constructing the walls to work as a strengthening reinforcement for the ganister. The sheet metal form was extracted after many hours, however as with cement, leave the ganister for at least a week or two to allow it to set up and cure before heating it up.
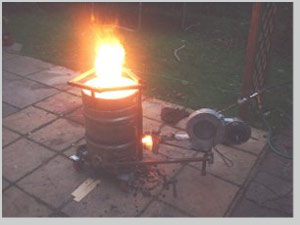
The blower is a 3000 rpm 1/125 horsepower squirrel cage fan provided with a damper over the inlet that permits the regulation of airflow. The blower is connected to a 6 or 8 inches length of 2 1/4 inch steel fence post that functions as the blower duct.
For the first time or two as you fire up the furnace , let the practice runs, to let the ganister to temper, as when firing pottery. If any cracks have been formed on the walls, they can be filled with the fireclay, but that too should be fired and tempered. Lastly, after a few firings, the wall will be stable and hard.
Firebrick and fire clay can be obtained from the building materials stores, which carry a fine range of masonry materials. The fireclay comes in different size bags and is a usually a very fine powder until it is mixed with water. Don't forget to wear to a dust mask while working with this stuff.
To crush the firebrick, put it in a bag made from the leg cut from some old blue jeans, and then go ahead to beat it with a hammer.
 To design the furnace to run it on a propane or LP gas fuel, braze a small right angle pipe fitting into a hole in the blower duct near the blower. Make sure that the pipe fitting has been extended into the center of duct, and a 1/4 inch compression fitting connected to the outside to permit the gas to be injected directly into the airflow. A pipe plug with various tiny holes drilled in it to function as a mixer / burner was screwed onto the inner end of the pipe elbow, but probably it was not essential. A 1/4 inch stainless steel tubing attached the compression fitting to an 18 pound propane bottle that I scrounged from a camper.
Make a small grate to keep the crucible up off of the floor of the furnace so as to maximize its exposure to the combustion heat. This was constructed using a ring of 3/4 inch steel band, with three steel legs connected with 1/4 inch steel bolts. This is topped with a little piece of expanded steel. Another little piece of expanded steel is positioned across the opening of the blower duct while using solid fuel.
An angle iron frame is screwed together to fit around the bucket to render a good support for the blower, and then bolted to an old 4 - wheeled lawn mower chassis to facilitate mobility to the furnace so that it can easily be wheeled from the garage to the yard.
However, the 1/4 inch tubing may have been a bit too small for the long run from the propane bottle. At any rate, it converts aluminum into liquid in short order. So the fuel can be changed to charcoal briquettes. The charcoal is difficult to deal with, however it is much hotter, burns much quieter, is more easily available at short notice, and only costs 3 to 6 bucks for a twenty pound bag that will melt at least three or four hundred cubic inches of aluminum.
A door can be designed at the bottom, which would facilitate a quick clean-out of air, in addition to functioning as a safety hole for the escape of liquid metal in the case of crucible failure
